Showing posts with label Green. Show all posts

Thursday, 28 May 2015

DIY Fantastic: Guerrilla Gardening

I've always joked about becoming a  Guerrilla Gardener. The idea of throwing wildflower bombs over fences into abandoned lots or neglected gardens and seeing the results grow and blossom always sounded like such a lovely antiestablishment act! And let's face it, as a goody-two-shoes at heart this is about as rebellious as I was ever likely to get! 


Finally, these long-harboured dreams have been turned into reality - there's really is nothing quite like getting a foot on the property ladder to get you invested in your local community and street improvements! Ha!


So tonight, I ventured out on to our street armed with 101 nasturtium seeds, a trowel and a watering can on a one woman mission to brighten up our street! Oh and I dragged the husband along to carry the watering can! (I think he enjoyed it, at least the guerrilla part at least!) 


We planted a handful of seeds under each tree, in the scrappy square of soil around each tree trunk. Created a series of trenches in the greyness and popped in a nasturtium seed or three into each. Covered them back up with a sprinkling of soil (aka dust and twigs) and watered thoroughly before moving on to the next tree.


And that's it. We now get to sit back and wait a while and hope for more rain! Each day I'll walk to the station hopeful of seeing my handiwork start to spring out of the earth. First as a teeny seedling, then grow into a strong little bushes and eventually burst into a root of colourful flowers! Hmm...we'll see! 

It's sure going to be a test of my patience mind! By the virtue of my daily walks in sure it'll feel like they're taking FOREVER to come to fruition, as I watch them grow a millimetre a day! But with the days and weeks, hopefully they'll bring a flash of colour and life to our already cute street over the summer. 


We picked nasturtiums as they are hardy, love scrappy, poor soil (which is what they're getting!!). They are bright and fun and hopefully easy to grow with very little tending! My ma bought out the pound store of nasturtium seeds last time she visited to stock us up in advance!!

As for hazards of the job, we got down and dirty with all sorts, the cigarette buts, the bottle tops, the dried dog poop (extra nutrients?!) and all sorts of natural debris. We both wore gardening gloves for the job and were super careful. Said gloves even got a deep bleach clean afterwards and I must have scrubbed my hands about four times before I was satisfied! Our remaining natural foes will now be the council weed-killing men (please don't do the rounds soon), dogs and drought! I don't often say this, but...bring on the rain!

I'm desperately hoping to one day spot a neighbour or visitor admiring the new addition to the street so that I can glow smugly on the inside knowing that each small change like this will help make our street a better place to live. (I'll report back if we manage it!)

So, what small steps have you tried to help contribute to your neighbourhood? I'm all ears - we need our next project!

P.s. you can see more about our first step onto the property ladder here and more gardening updates here.

Saturday, 21 March 2015

The Potting Shed Fantastic: Spring!!!

Bluebells appearing for Spring
Happy first day of Spring! Winter felt way too long this year and at last the days are starting to lengthen and I can feel the promise of spring in the air. At this time of year the occasional warmer, brighter day keep us hooked with baited breath for summer. And naturally, this starts me thinking about just one thing....gardening!! (Okay, as well as holidays, flip-flops, bbqs, beaches, sailing etc.!)

Anemone shoots braving it to appear above ground
This will be our first year with a proper decent garden! And I am beside myself with excitement! We've said goodbye to our teeny square of concrete totally encircled by brick walls and moved up a rung to a slightly larger rectangular garden, circled by four fences!! Haha, but there is definitely much less concrete so a clear step in the right direction! 

Today I wanted to share our priorities for Spring time in the garden this year. I have grand plans for the garden eventually, but given it take time to develop and mature I know this is a multi-year project, so starting small...

Seedlings

The cutest sweetpea shoots

I've already got a whole bunch of bulbs and seeds planters indoors and they are starting to show their sleepy heads! This is my favourite part of gardening - when the tiny shoots are in the safety and confinement of the controlled conditions of our house and you can see the little steps of progress made each day!! And before they are let out into the wilderness of our garden and become prey to all sorts of urban wildlife! :s

In fact, our dining room has pretty much been repurposed to an indoor greenhouse at the moment:

Ranunculus thriving in our indoor greenhouse!

Climbers

On the outside, we need to cover the box of fences, and quick! I have already stated bulk buying all possible climber I can get my hands on!!

Honeysuckle starters
We have planted climbing roses (at least 4, I'm losing count!!) and my latest additions have been two honeysuckles on the shaded side. Plus we have added two thornless blackberry plants, a Japanese Wineberry and a Loganberry plant all at the bottom of the garden. Which may just have to become our soft fruit patch, yum!! :) 

Beautiful red stems of the Japanese wineberry
Ben's Valentine's Day pressie was a vine sapling - Pinot Noir no less! It's shooting already and we just need to find the perfect spot for it to get started in. And finally, to round off this collection of climbers I just want to add some summer flowering clematis to get some bright big flowers! 

Composting

Finally, on a slightly less glamorous note, composing. We have a giant composting bin that we've been adding to all winger long. The walk out tot the end of the garden in the dark and cold winter evenings is NO FUN! Particularly when you lift the compost lid and just KNOW it's full of slugs, worms and flies, but you just can't see them in the dark! Eeeek! But thankfully they are all working their magic in there to make usthe yummiest more nutritious humus ready for spring! 

We're actually close to maxing out on the compost bin so may wen have to strut a second! We're gonna have the best fed garden in the whole of London come Summer !!! :D 

More bluebells
As soon as this plethora of bluebells open up their blooms I'll be sure to get my camera out there once again. I plan to share a few snippets of our garden progress here over the next 6 months as we go from novice plant killers to pro green-fingered Bob Flowerdews!! :)

So, this is our starting point, what are you focussed on this Spring? Be it in the garden or indoors?!

Saturday, 29 December 2012

DIY project: Outdoor cushion covers

This is something I've been planning on doing for aaaages! Not particularly appropriate for this time of the year I'm afraid. But, I'm far too impatient to save this one for Spring, so here goes!

We had four lovely outdoor cushions that we inherited along with the outdoor furniture, but they are starting to show their age. So I decided to spruce them up! Back earlier in the year I raided a design guild warehouse sale in White City and scored some fantastic bolts of material and decided this was the project for it!

This is the 'before' pic, our four perfectly formed cushions, in need of a new lease of life:


Then find your perfect fabric. I went with a fairly thick fabric, so hopefully durable. It has a watercolour wash finish, which will hopefully disguise the smaller trials and tribulations of outdoor eating. And bright bold strips which remind me of deck chairs - they scream British summer (think bright blue skies and a stiff cool breeze, hehe).

The how to is fairly simple, it can be done with a sewing machine or by hand (I started by hand and admittedly it was taking a while!). I took one cushion and made a pattern by drawing around it and adding an inch for the seams. I then cut out the 8 sides required and tried to ensure that the stripes would line up when sewed together (easier said than done!).

Once lined up in pairs, I pinned them together (inside out) and sewed around the outside. I left a gap of a good few inches at the back to turn the cushion cover inside out and then squeeze the cushion in through! Once we had a snug fit and were happy with the result I sewed up the gap with a topstitch. If you wanted to have removable covers you could sew in a zip (tricky!) or some velcro (much simpler!) across the gap for easy access.

As simple as 1, 2, 3 (pinning, cutting, sewing!)


I left the covers a little bit roomy and then sewed through the cushion at four points to give the cushions the same shape and added four buttons to each side to hold them together. The final result looks a little bit like this...

Close up, check out the contours!
With the table set :)


All ready for a lazy afternoon in the garden...(okay maybe it's a but chilly to actually sit out there right now!) 


On another note - can you believe this last shot was taken in DECEMBER - look at all the bushes and creepers still in flower. Bloomin' ridiculous! (If you'll excuse the pun.) Shame it hasn't been warm enough (or dry enough) to sit out there and actually enjoy them (story of the year!).

And as a final sneaky bonus, this is what you get when you ask the man-about-the-house to pose for a action shot:
They say never work with animals or children....or boyfriends! 


Cheers m'dear! :)

Sunday, 18 November 2012

DIY project: Crystal embellished sweater

So to go with all this Autumnal weather we're having it's time to spruce up the wardrobe. I am useless at layering, far too complicated! So one big snuggily cover-all sweater is right up my street.

I was super lucky to spot this giant GREEN (swoon) sweater in a thrift shop in the Lanes in Brighton on a girly weekend away. And even luckier when we found out that everything in the shop was half price, bin-go! So I nabbed myself this bargainous deal and my diy mind went into overdrive:


It's a giant size XL and super snuggly, but my favourite thing is that is has someone else's name ironed into the inside. So XXXX if you're out there, your old sweater has gone to a great home and is making me very happy right now! :)

I decided some further embellishments were required to give this the bling factor. I already told you, I'm obsessed. What I used:

Swarovski sparkles! I know you've already seen these, but they are just TOO pretty!
Plus some nifty tweezers and fabric glue.


The comes the fun bit! Get crafty with the sparkles and glue to embellish the eagle! Careful with this glue, it's toxic so use in a well ventilated area and the tweezers really help you avoid getting glue EVERYWHERE!

The tweezers were a godsend! 
As well as embellishing the eagle I added some bling to the lettering.


This was a pretty simple project and the results are bling-tastic! Now I feel I can wear this sweater out anywhere, it's given it a big lift and a smidgin of fashion qudos! This is what the finished article looked like - I popped it on with some patterned leggings and little black boots, yummy! I'd wear this to hit the shops, indulging in a long sunday roast or just relaxing with friends.

The finished article!


Worn with patterned leggings


Or hang out with the cat! :) Ok he's the neighbours', but he likes to visit us when they're out! 


Saturday, 20 October 2012

DIY inspiration: Oversized green sweaters

I am loving these monster green sweaters. Giant comfy greenness, with a hint of the glam! Perfect for autumn weather me-thinks and ripe for a diy!

Killer green Kenzo sweater! From here.


Caroline's fab Urban Outfitters sweater in a popping green. From here.

Wednesday, 12 September 2012

Wishes: to eat more greens

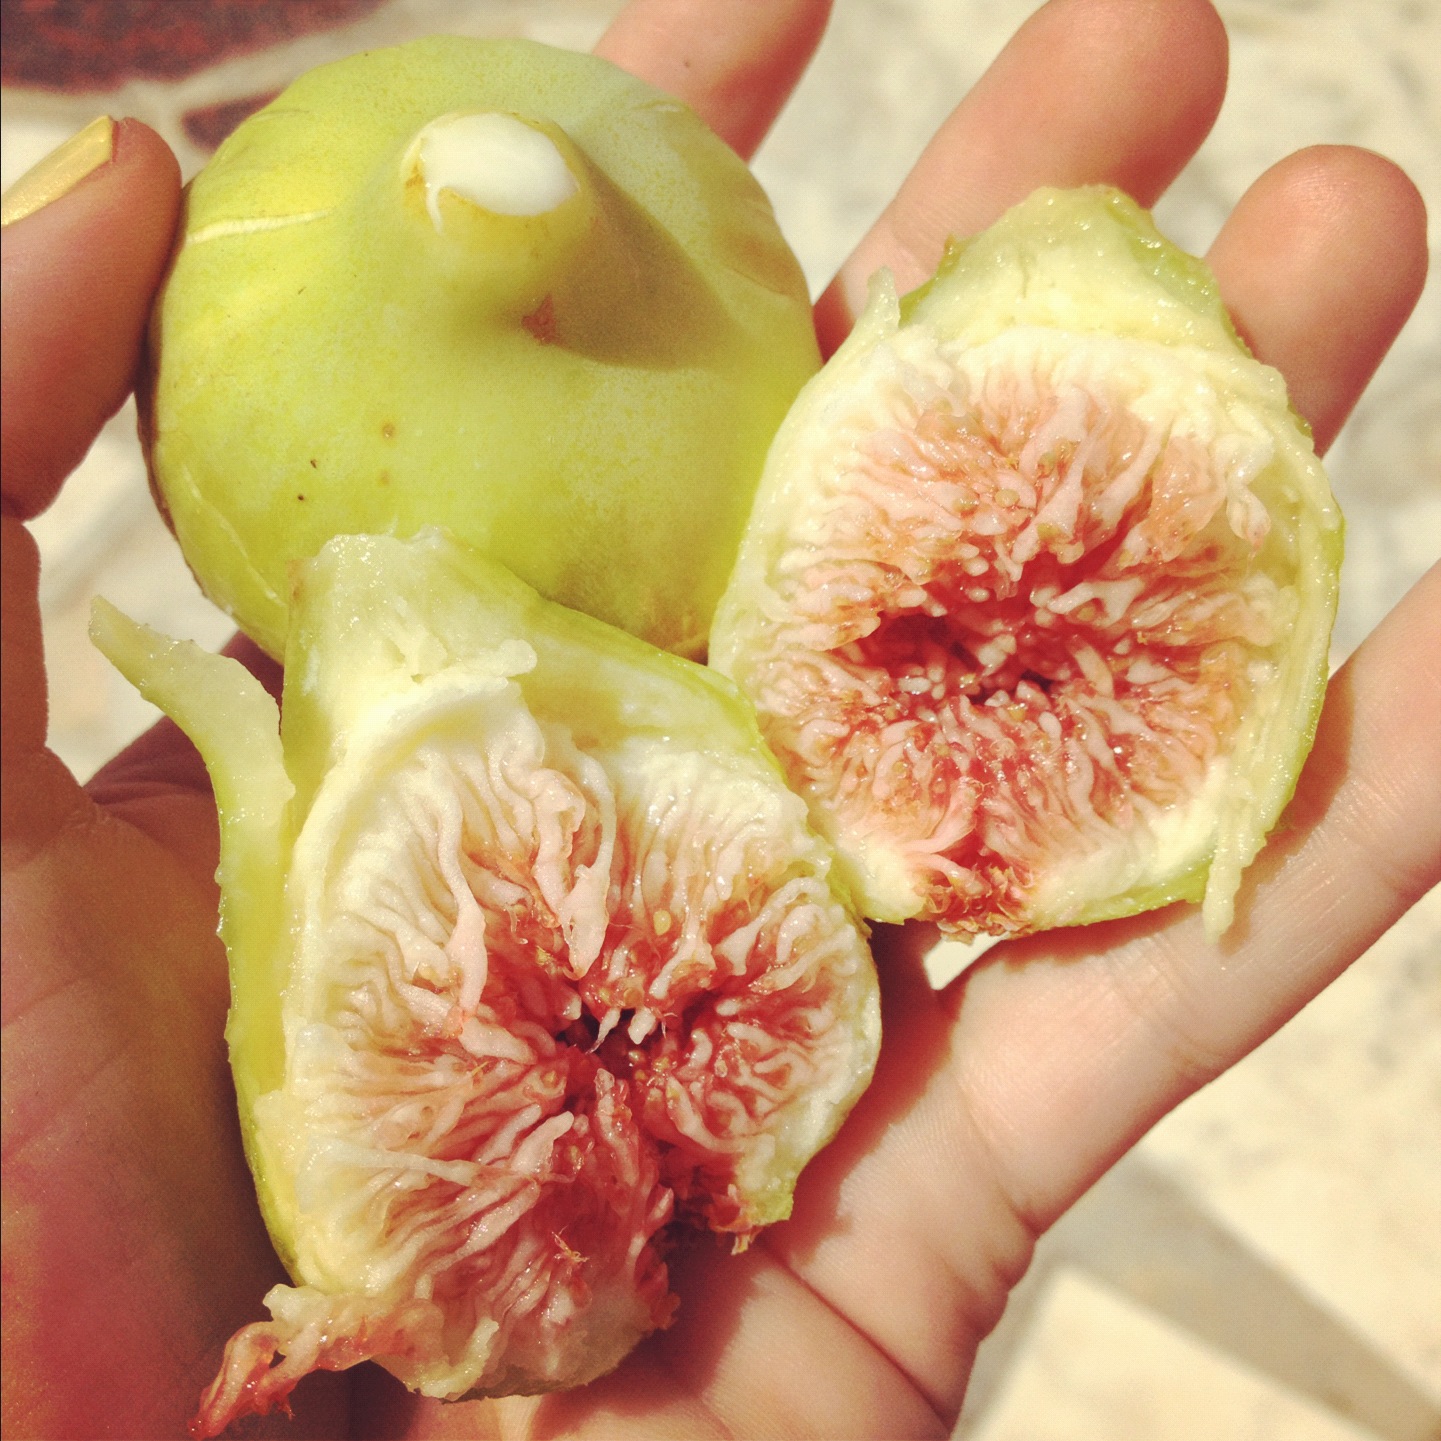
Figs, picked fresh from the tree!


Oh it's easy to make these brash resolutions on here, and it's even easier when the villa has five huge fig trees in the garden literally weighed down by the plum juicy figs on it's branches! I couldn't get through enough of these little green fellas in Ibiza, but luckily the rest of the garden wildlife was doing a good job of helping. 

So now we're home it'll take a little more effort (who am I kidding) to keep up the good work. Especially as we descend into the wild, wet and windy winter and figs become a fig-ment of my imagination (ta-dah!). But at least there will be plenty of turnips, swedes and other root vegetables in the supermarkets....sob sob. 

Oooh and the legendary sprouts of Brussel might make it on to the dinning table for their once annual outing, on that holiest of holy days. Aha, there's something to look forward to! 

Monday, 9 July 2012

One to dream of: The green bug


Minty green chairs and chunky textured white walls - a dreamy combination!

Industrial chic at it's absolute bestest.

From: vosgesparis