

Turns out marshmallows are incredibly simple. There are just two ingredients. Literally, two. Sugar and gelatine. I followed this recipe, specifically chosen as I didn't want to use egg white. Rather it uses gelatine for setting and whipping for lightness.

The production process is also equally simple (if treacherous!). This is not one for the faint hearted!! First you BOIL sugar and water for twenty minutes, stirring continuously. Cue mega arm guns workout! But that boiling sugar is HOT so you have to be mighty AND precise in your stirring! Some recipes called for a thermometer, which I don't have, so we just winged this a little. Twenty minutes of a continuous rolling boil plus an extra blast for the last 5 seemed to do the trick!
Then the danger level ratches up another notch as you whisk said boiling liquid!! :s Pour the boiling syrup into a LARGE bowl with the gelatin and whisk your little heart out...for another 20 minutes. I say large as you're looking to at least double the volume of your mixture, and some! We got right up to the rim of my largest bowl by the end and our poor whisk was definitely out of it's depth!!

At this point it should be BIG and light and leave ribbons along the surface. Then you can go to town on flavouring, colouring and decorating! We divided the mixture up and made half with a dash of pink colour and rose water and another we left white and added orange oil. Yum!
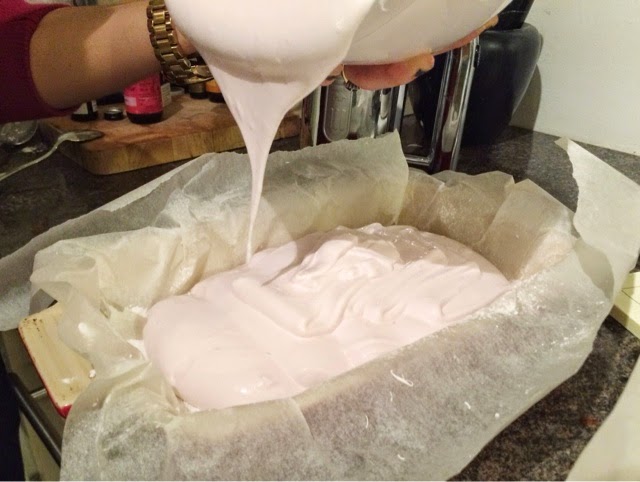
Then you decant into a large flat container lined with buttered baking paper dusted liberally with icing sugar, top with a another dusting of icing sugar and allow to set. Note: don't pop it into the fridge, cooling at speed will enable crystals to form and you'll loose the silky smooth texture.

Finally, once fully set (I left ours overnight covered gently by a tea towel) tip out on to the work surface (dusted once again with more icing sugar!) and cut into any shapes you like. Dust each freshly cut side with more icing sugar and pop them, piled up high, in an air tight container.

We rolled a batch of freshly cut cubes (not dusted in icing sugar) in toasted coconut flakes and they were the firm favourites. You could use nuts, seeds, fun-fetti, whatever takes your fancy!
Store in an airtight container and tuck into at every opportunity - My favourite is piled into hot chocolate or toasted on the fire! Stored carefully they should last up to a week, but they are DEF the yummiest when eaten fresh!! :)


Out-take: this below is the sticky end of my delicious looking hot chocolate. Attempting to precariously balance it on a chair for an Instagram marathon resulted in disaster (got the physics all wrong!). Gutting and the clean-up exercise was a complete MISSION! :s Serves me right for prioritising Instagram and not tucking straight in!

No comments:
Post a Comment