Monday 27 January 2014

Fantastic Travel: Sicilia 2013


I've been day dreaming of warmer climes again, bad habit of mine during winter! Not sure if it gets me through the cold and wet winters here or if it just makes it harder! Hopefully the former. So to ease the winter blues I've been trawling through our holiday photos from Sicily! I hadn't shared any of these here as yet, simply too disorganised. So I thought I'd share a few favourites to help us all through the darkest days of winter. :) 

First of bougainvillaea, how can it not make you smile? Bright and beautiful. And it was everywhere in Sicily!! 


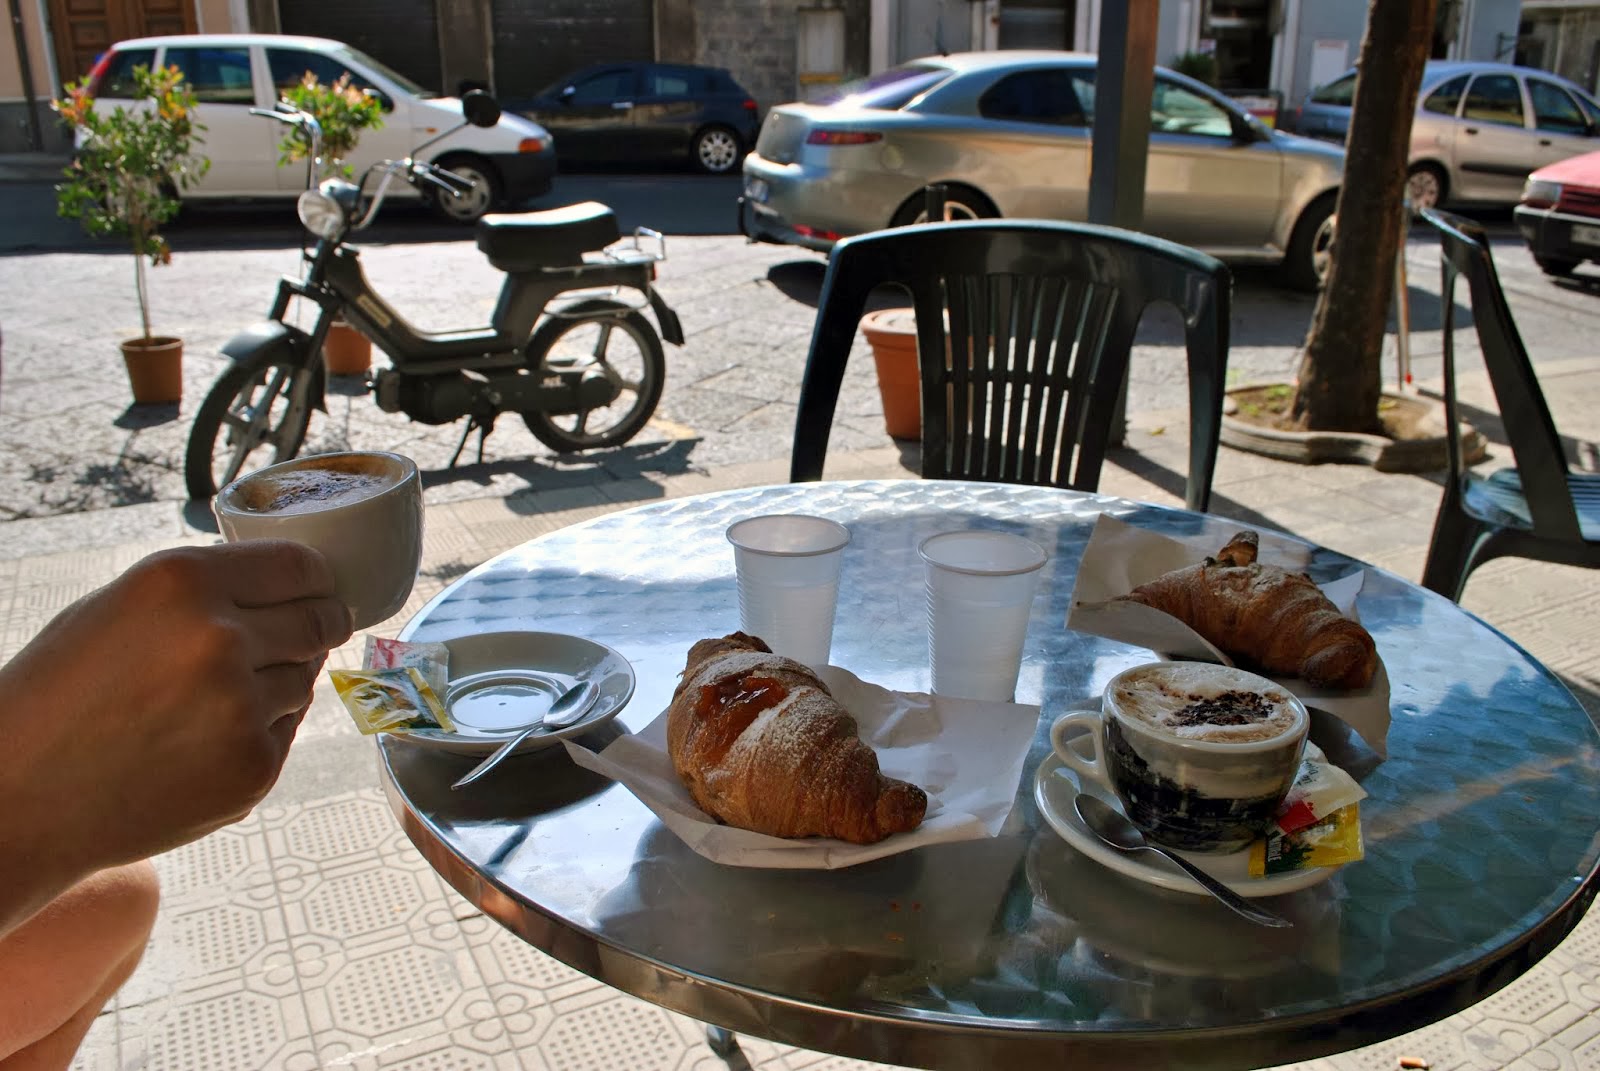
Breakfasts in Italy magnificent - we found a number of fabulous cafes and cake shops around the Island and the choice is plentiful. Be it cornetti filled with cream or custard with a fiendish shot of espresso or as a special treat a delicious cannoli filled with ricotta and chocolate chips. Either way, pudding for breakfast is always a sure fire way to start my day!


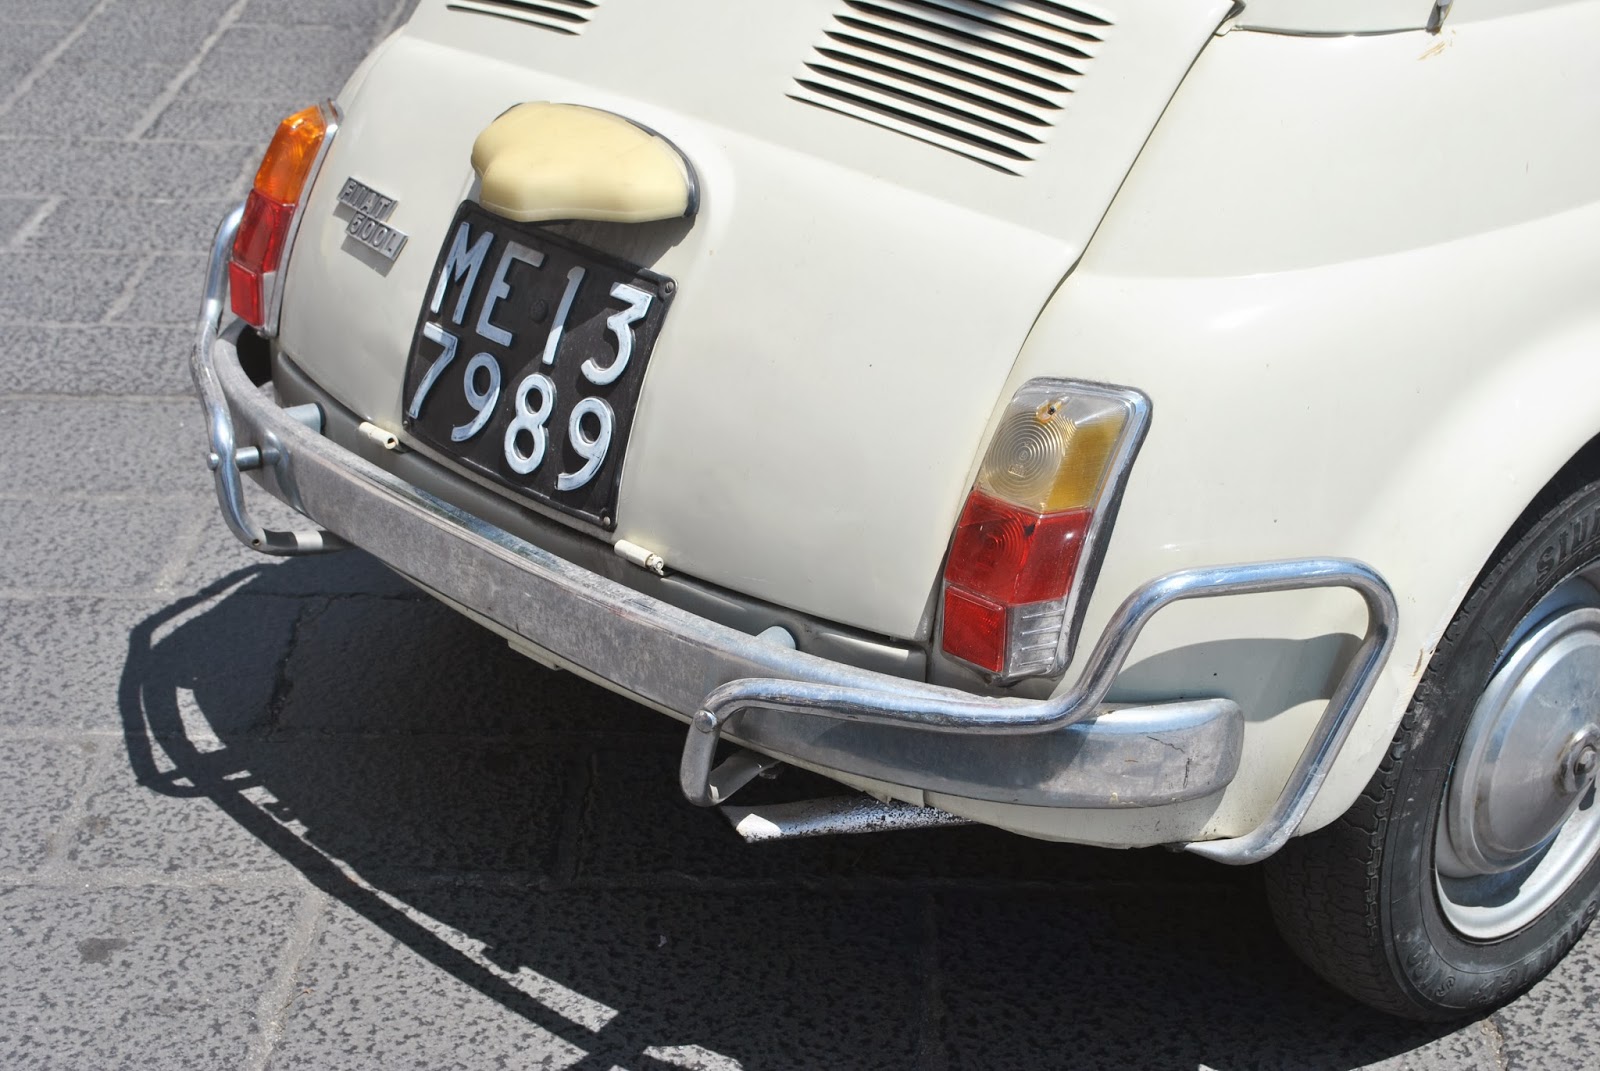
Who can help but LOVE all forms of Italian motor vehicles, be it the cutesy cinquecento or the trusty vespa. They are all scattered all over the island and are certainly not treated as treasured relics, most are still work donkeys for the locals. 


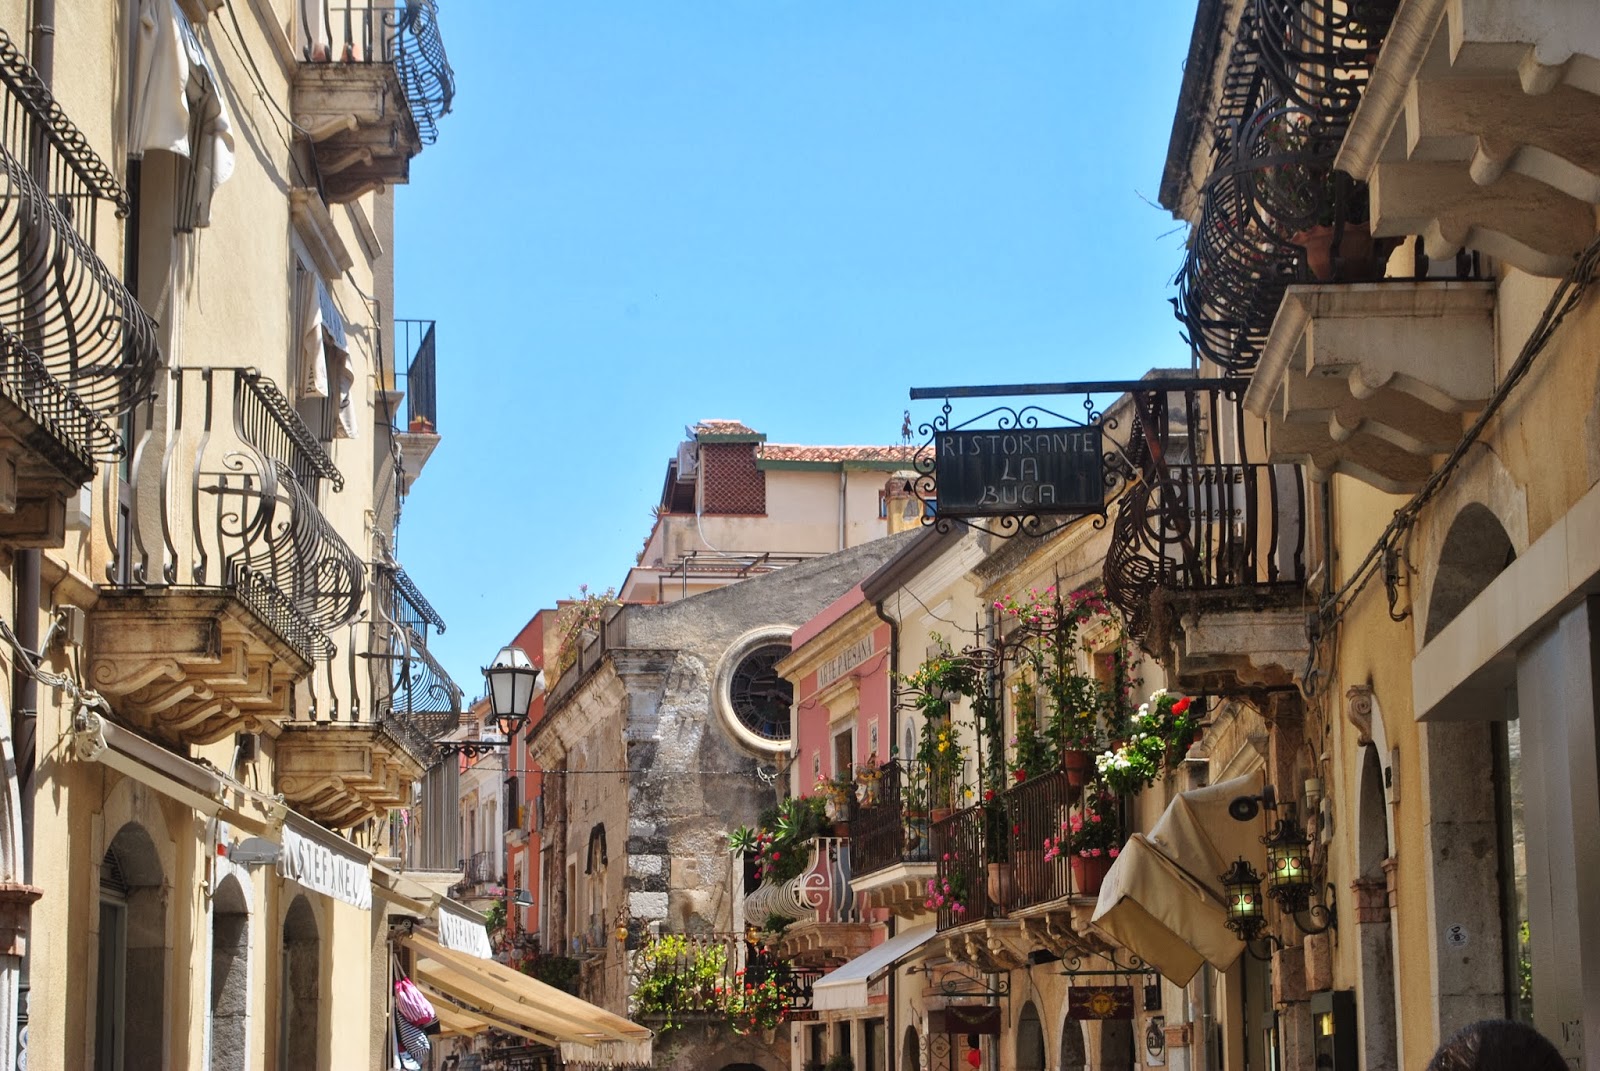
The other man made wonders are the towns and their architecture. Some magnificent and sparkling and others crumbling and wistful, but either way incredibly magical. This is the church in the main square at the heart of the popular town of Taormina and one of the winding streets on the way there.


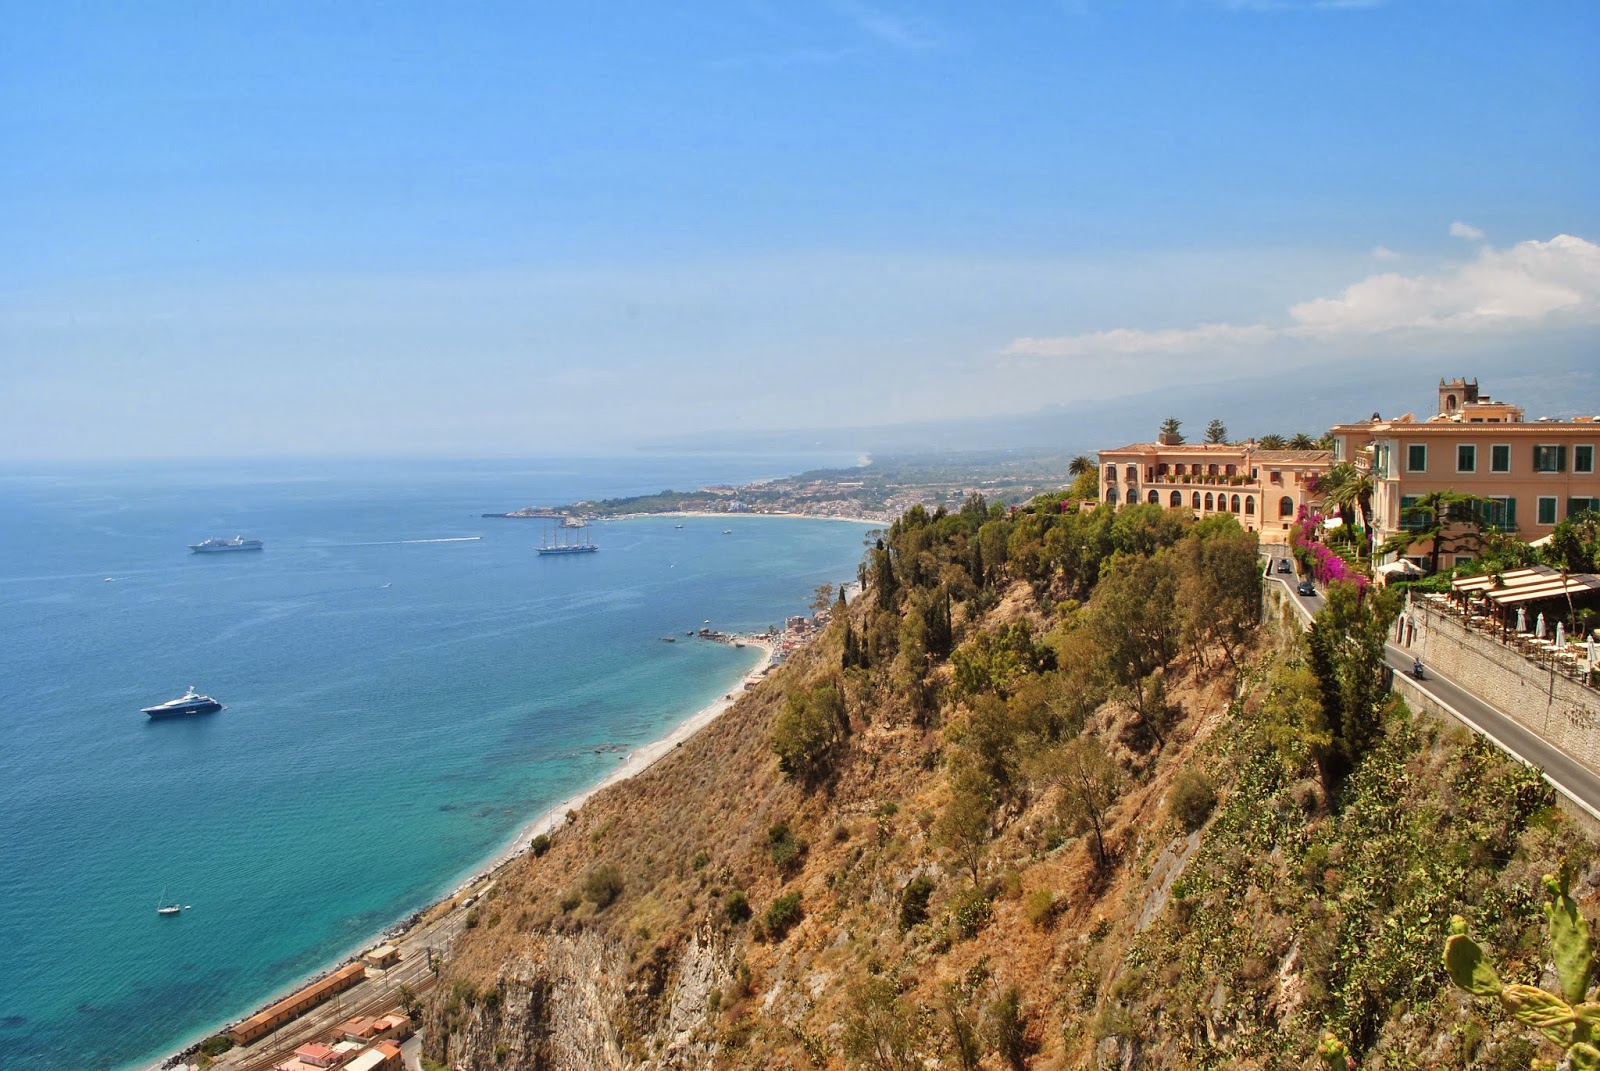
And last, but most definitely not lest the epic landscape! From the soaring heights and barren summit of Mount Etna to the turquoise mediterranean sea. We undertook the hike to the top of Mt Etna on foot, without the aid of the cable car and it was unbelievable. The volume of lava rocks covering the whole mountain was incredible and the steam and smoke rising from the crater both spooky and exciting! 


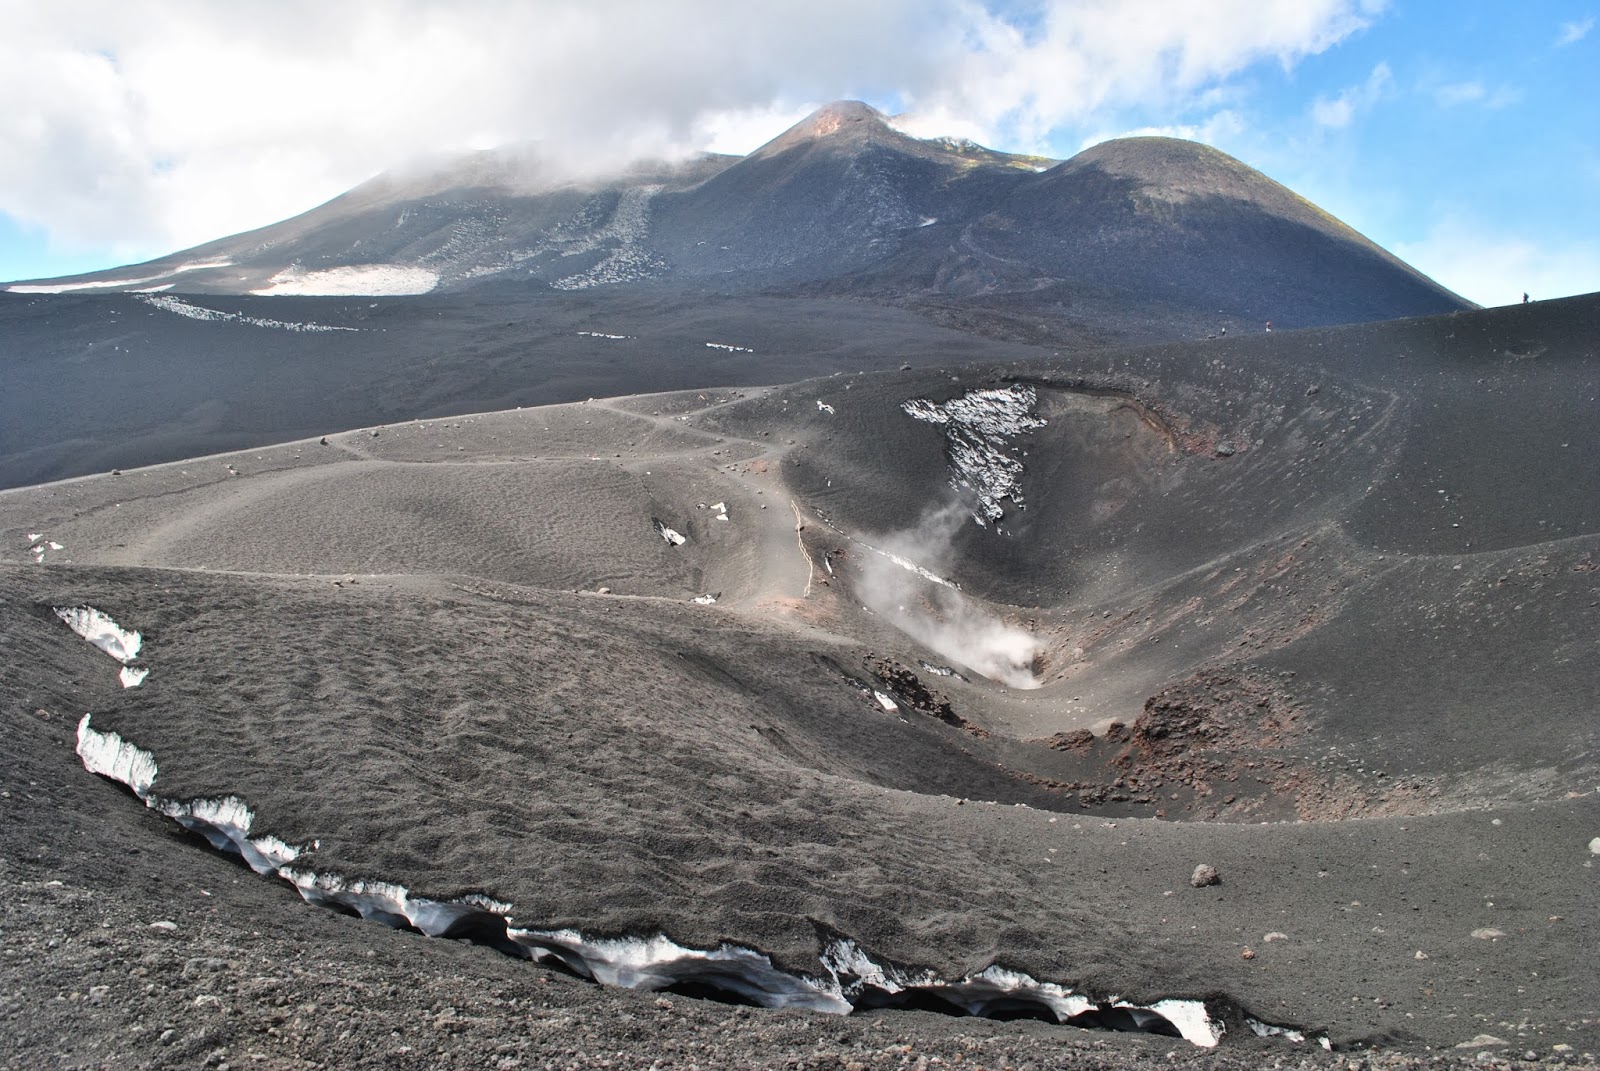
These pictures don't do it justice - the steepness of the sides and the depths of those craters made it petrifying to stand at the edge, particularly in high winds with tired legs!! Back down at sea level the coastline was often just as steep, but much more serene and relaxing. The turquoise Med showing off it's best colours along the fringes of the Taormina coast. 


 And on our final passeggiata along the seafront in Cefalu before dinner on our last night! <3 comment-3--="">

Thursday 23 January 2014

DIY Fantastic: Rose Petal Confetti

Here we go...the first of what I expect to be a veritable flood of vaguely wedding orientated diy instalments for us. Brace yourselves folks. I can barely call this a diy, it's more of a just do this and this will happen sort of post. But still, I am so excited about the results I simply have to share! :)


A bunch of roses Ben brought home the other day were starting to look a little sorry for themselves. To be honest some of them were starting to get crispy! This is what gave me the idea...rather than bin them, to keep the drying out process going and dry all the petals for confetti. So, the only thing you really need for this diy is a sorry looking bunch of roses and some patience!


I simply gently held the rose in one hand and pulled the stem out from the back of the flower. this helps loosen up the petals. Then I gently slowly peeled each petal off one by one and unravelled the layers. I placed each petal carefully on a bamboo mat keeping them as flat as possible and flattening out any kinks, especially in the inner petals.


From there on in it's uber simple. I just left them out until they were dry and crispy! Each day I gently turned the petals, flattened them out and unravel any rollers. Once I was happy they were fully dry I popped them in an airtight jar for storage with a little bit of tissue and hey presto!


And this was a lot of fun:


It was also a lot of mess to clear up, you don't think we got that sequence on the very first try do you?! Rather bizarrely our first attempt turned out to be the best, but we didn't realise that until we'd cleared up this mess a fair few times!!!


So now Ben has an excuse to buy me roses every time he pops to the shops, win-win!! :)

Thursday 16 January 2014

DIY Fantastic: Watercolour Greeting Cards

Ever find yourself caught short just before an important event, a birthday, an anniversary? No? Then maybe it's just me. Because I'm afraid I always do. But, my go-to back up in a situation like this is to whip out my card stock and some paints and rustle up a quick watercolour card.


Sometimes watercolours get a bad press, they can be difficult to manage because everything dries so fast! Plus they are very different from other mediums such as acrylics and oils that you can re-work over and over, they often have a life of their own and the dry result can look very different. But for me that's the beauty of watercolours, the speed makes it unpredictable and means you get a different result every single time. Plus it's great for a busy gal since it's so fast, free and fun! There are absolutely no barriers to entry you, all you need is watercolour paper, watercolour paints, a fine brush, water and some inspiration:


I used A6 watercolour such as this and drew a gentle line down the middle, using a ruler, where the crease would later be made to turn it into a card. I used half of the paper for my illustration. In this instance it was all about fishing vouchers for the family, so I set to it armed with a wikipedia's Brown Trout page for inspiration. :p I very roughly sketched out the shape in pencil, mostly to get the proportions right and then I cheated a little by using black ink to create an outline and add some detail.


However, to be honest there's not so much detail on a fish, so launched in with the colours pretty swiftly! I must admit to being a little free and easy with the colour interpretations of the so-called 'brown' trout. But who wants a card with a brown fish on the front??! ;) I didn't want to feel restricted by the black lines, that just makes it all a bit cautious. So I took relish in going outside the lines, quite liberating in fact!

I tried a couple of different perspectives and even got a bit adventurous and branched out from the brown trout to something a bit more exotic! 


What do you think? Why not give watercolours a whirl? Anything goes and the more interpretive the better! And if at first you don't succeed, try try and try again! (Practice really does make perfect with these bad boys!!)

Friday 3 January 2014

DIY fantastic: hand lined envelopes

Bit surreal there, we went from high summer in Ibiza to full on winter Christmas mode. Hope that wasn't too much for the senses! Anyway, December in the real world was super busy as usual. We've been beavering away working on our save the dates for the wedding, which we wanted to double up as our Christmas cards, and hence had to be dispatched asap! I shall be sharing all the details of the cards themselves and how we made them shortly, but in the meantime here's part of the story for today - the cute kraft paper lined envelopes we made!


Quite a simple project really. Well in theory it is, until you multiply it by 60 times and then it's a whole lotta envelopes to prepare!!! :s

What we needed:
1. Kraft paper, or any other decorative paper that takes your fancy. For this one, I used kraft paper with small sparky trees on it, for a Chrismassy vibe. But you could easily pretty papers for all other times of the year.
2. Plain coloured envelopes
3. Glue stick
4. Scissors
5. Card to create a template. I used a magazine cover, hence the lovely lady sporting the sparkly dress! :)


To create a template I used a process of trial and error until it was just the right size to fit within the gummed edges of the envelope flap and then on the body of the envelope side was big enough to cover the whole visible area. This was basically the hardest bit! Once you've got a template you're happy with you're as good as done! :p

Steps 1-3 below: Take your template and place it on the face up paper aligned in accordance with the print e.g. to ensure my little fir trees were growing upwards and not down! Draw around it and repeat, aligning them in order to maximise the usage you can get from the width of the paper.


Steps 4-6 below: take an envelope and kraft paper cut out, using the stick glue, cover the back of the envelope an the flap with glue. Carefully slip the cut out into the envelope and align it carefully to leave the gummed area on the flap free. Press down the kraft paper and smooth it out to give a clean wrinkle free finish. Finally flip the envelope over and create a crease to close the envelope.


And that's it, you have your gorgeous hand lined envelopes at the ready for all your snail mail! This could be done with any combination of colours and patterned papers, matching or contrasting, just get experimenting! It'd be cute for personalised greetings cards, thank you letters for all those lovely Christmas pressies you or in preparation for a valentines day cards - to make someone feel that little bit more special!


Thursday 2 January 2014

Welcome fantastic 2014!

So folks, 2014 has arrived, Happy New Year! Hope you all welcomed in the year in style!


Okay, I may have cheated a little there - this was actually taken on guy fawkes night in Battersea Park! But the sentiment was right! :)

As usual, we're all thinking of our new year's resolutions at this time. We're also looking back at 2013 at all the wonderful and exciting things we've been up, and the things we've achieved. We may also remember the odd thing that didn't go so well, but hey we've learnt our lessons from them. Looking back on my resolution for 2013, which was to blog 4 times a month, I almost made it! 38 out of 48 posts - sooo close and up on the prior year. What I've learnt is that I should have been reviewing my progress towards the end of the year to see how I was doing, surely I could have squeezed in a few more at the end there if I'd realised!! 

2014 is going to be a huge year for us, we're getting married and looking to buy a house! Those are two massive things to tick off the list, and they come with so many other possibilities - just think of all the diys and projects!! Can't wait to get started on them and share it right here! So I'm not going to add a huge list of other resolutions to the mix. I'm going to stick to and build upon the progress of last year by posting at least once a week. That ups it to 52 posts in a year. Bit of a challenge, but one I think I really know I can achieve, without compromising on quality or content. 

What are your new year's resolutions? And what are you planning on getting up to over the next twelve months? What ever it is, I know it will be spectacular! So, here's to an amazing 2013 and an even better 2014!